Flourless Chocolate Chip Muffins

You’ll never guess the power packed superfood hiding in these chocolate gems.

Photography by The Eclectic Kitchen

Photography by The Eclectic Kitchen

When I started this blog I orginally asked my Instagram audience what types of recipes they’d like to see. “Hidden Veggie” recipes were among the popular responses. As much as I feel victorious when my child eats a leaf of spinach willingly, it does feel great to know that I’m secretly packing extra nutrition into unlikely places. NOW, that being said, I do strongly believe that kids will eat when they are hungry. If you continue to serve those veggies and demonstrate eating them by modeling, eventually your toddler or even teen, could come around, Don’t give up introducing healthy fresh veggies to your kids! In the meantime. Make these muffins…You’ll feel real good about yourself when you do.

Flourless Chocolate Chip Muffins

Recipe by: Skylar Edberg in collaboration with The Eclectic Kitchen

Yield: 24 mini muffins

Prep time: 5 minutes

Cook time: 12 minutes

INGREDIENTS

  • 2 large eggs, beaten**

  • 1 large banana, mashed

  • ½  cup unsalted almond butter

  • ½ cup maple syrup

  • 1 cup pure canned pumpkin

  • ½ cup unsweetened cocoa powder

  • 1 tablespoon ground flax meal

  • 1 ½ teaspoons baking powder  

  • ⅛ teaspoon kosher salt

  • 2 teaspoons vanilla extract (try espresso powder for a grown up version!)

  • ½ cup mini semi sweet or dark chocolate chips, plus more for topping.

METHOD

Preheat oven to 350 F and grease a mini muffin tin with non-stick cooking spray. Line the cups with mini paper liners if desired.

In a large bowl, using a whisk or rubber spatula, stir together the eggs, almond butter, maple syrup, pumpkin, cocoa powder, flax seed, baking powder, salt and vanilla extract. Stir until completely combined and smooth. Fold in the chocolate chips until incorporated.

Using a tablespoon measure or mini ice cream scoop, drop 1 tablespoon mounds into each well of the prepared muffin tin. Each cavity should be filled to ¾ of the way up.

Sprinkle each muffin with about a teaspoon of additional chocolate chips and bake for 12-15 minutes until the muffins spring back slightly when touched.

Store muffins in an airtight container at room temperature for 4-6 days, or in the freezer for up to 3 months.


** For an egg free version, substitute with flax egg

Instant-Pot Pulled Chicken Lettuce Cups

You asked, we delivered. Here is a pressure cooker recipe worth drooling over.

Photography by The Eclectic Kitchen

Photography by The Eclectic Kitchen

It’s tangy, warm, comforting and a breeze to put together. As moms, The Eclectic Kitchen and I are always on the hunt for easy one pot meals that can feed a small army for a few days! This bbq pulled chicken is SO beyond easy and versatile. In this recipe we used the chicken to make lettuce cups, The combination of the crisp cool lettuce and the warm zesty chicken topped with creamy bleu cheese and pickled onions is like a party in your mouth! It would also be awesome on a salad or hamburger buns as a bbq chicken sandwich. I hope you have fun with this recipe! please leave a comment below to tell us what you think!

Photography by The Eclectic Kitchen

Photography by The Eclectic Kitchen

Instant-Pot Pulled Chicken Lettuce Cups

Recipe by: Skylar Edberg in collaboration with The Eclectic Kitchen

Yield: 6-8 servings  

Prep time: 20 minutes

Cook time: 30 minutes for chicken, Overnight for onions

INGREDIENTS

For the pickled onions:

  • 2 small red onions, very thinly sliced

  • 1 cup hot water

  • 1 cup white wine vinegar

  • 3 tablespoons granulated cane sugar, raw preferably

  • 2 teaspoons kosher salt

  • ½  teaspoon dried thyme leaves

    For the Chicken:

  • 1 tablespoon garlic powder

  • 2 tablespoons onion powder

  • 1 tablespoon sweet red paprika

  • 2 teaspoons kosher salt

  • 1 teaspoon black pepper

  • 3 pounds boneless, skinless chicken thighs, trimmed (Breast can be substituted)

  • 2 tablespoons olive oil, divided

  • 1 medium onion, halved and sliced into ¼ inch strips

  • 2 garlic cloves, minced

  • 2 tablespoon tomato paste

  • ½ cup broth of choice

Method

For the pickled onions:

Place the onion slices in a large mason jar, use two if necessary. In a separate bowl or large liquid measuring cup, whisk together the hot water, vinegar, sugar, salt and dried thyme leaves until sugar and salt are dissolved, about 1 minute. Pour the mixture over the onions, tightly seal the lid to the jar/jars and allow the onions to pickle in the refrigerator for at least 2 hours or overnight for best results.

For the chicken:

In a small bowl, combine garlic powder, onion powder, paprika, salt, and pepper. Season the trimmed chicken thighs with the spice mixture and rub the spices into the meat to ensure an even coating.

Remove the lid from the Instant Pot, push the sauté button and heat the olive oil for about 2 minutes until it shimmers in the bottom of the pot. Sauté the onion slices for about 5 minutes until softened. Next add the garlic and tomato paste and cook for 1 minute longer to allow it to caramelize. Cancel the sauté function, add the broth and scrape the bottom of the pot well to prevent burning.

Add the seasoned chicken thighs on top of the onion then pour 1 cup of bbq sauce over the chicken.

Secure the instant pot lid and lock the steam valve. Cook on manual high pressure for 20 minutes

When the pot has finished its timer, wait 10 minutes to allow the steam to naturally release.

Using two forks carefully shred the chicken thighs and add extra BBQ sauce if desired.

Serve the Chicken in lettuce cups topped with the pickled onions, bleu cheese and bacon crumbles or serve on hawaiian slider rolls alongside sweet potato fries or tater tots! This chicken is meant to be versatile for all types of occasions!


Overnight Quinoa Porridge

Slay the day with this totally customizable breakfast staple.

Photography by The Eclectic Kitchen

Photography by The Eclectic Kitchen

The Eclectic Kitchen and I LOVE this overnight quinoa porridge because it’s 1. super easy 2. super yummy 3. super customizable so you don’t get bored and 4. super full of delicious and insanely nutritious ingredients to get your mommy morning going full-tilt. So basically you may have noticed it’s just all kinds of delicious!

We’ve made two versions here, the first is a rich berry and almond butter porridge bowl for a hearty start to your day. The second is a tropical porridge bowl to transport you to a warm island on a chilly Monday morning. I love serving this to my son as a protein packed alternative to rolled oats. Its worth the mess knowing he’s taking in so many important nutrients for his development. Take this porridge wherever you want to go by customizing your own toppings!

Photography by The Eclectic Kitchen

Photography by The Eclectic Kitchen

Overnight Quinoa Porridge

Recipe by: Skylar Edberg in collaboration with The Eclectic Kitchen

Yield: 2 servings

Prep time: 10 minute

Cook time: 5 minutes

INGREDIENTS

  • ½  cup quick oats

  • ¼  cup uncooked quinoa, rinsed well

  • 2 cups unsweetened almond milk

  • 1 teaspoon vanilla bean paste or extract

  • 2 tablespoons maple syrup or agave nectar

  • ⅛ teaspoon kosher salt

  • Fresh fruit, nut butter and granola for topping

Topping Ideas

Berries

Almond butter

Bananas

Super seeds and ancient grains

Raw honey

Cubed mango

Kiwi

Unsweetened Coconut flakes

Cacao nibs

Raw honey

METHOD

  • In a small saucepan over medium heat, combine quick oats, quinoa, almond milk, vanilla, maple syrup and salt. Bring mixture to a boil, reduce heat and simmer for about 3 minutes, stirring occasionally.

  • Remove from heat and place the lid on the pot. Allow porridge to cool completely and store in the fridge overnight. Enjoy cold with warm almond milk and toppings or warm in the pot on the stove over low heat until warmed through.


Slow Roasted Citrus Salmon

Perfectly cooked, moist and delicate salmon every time.

Photography by The Eclectic Kitchen.

Photography by The Eclectic Kitchen.

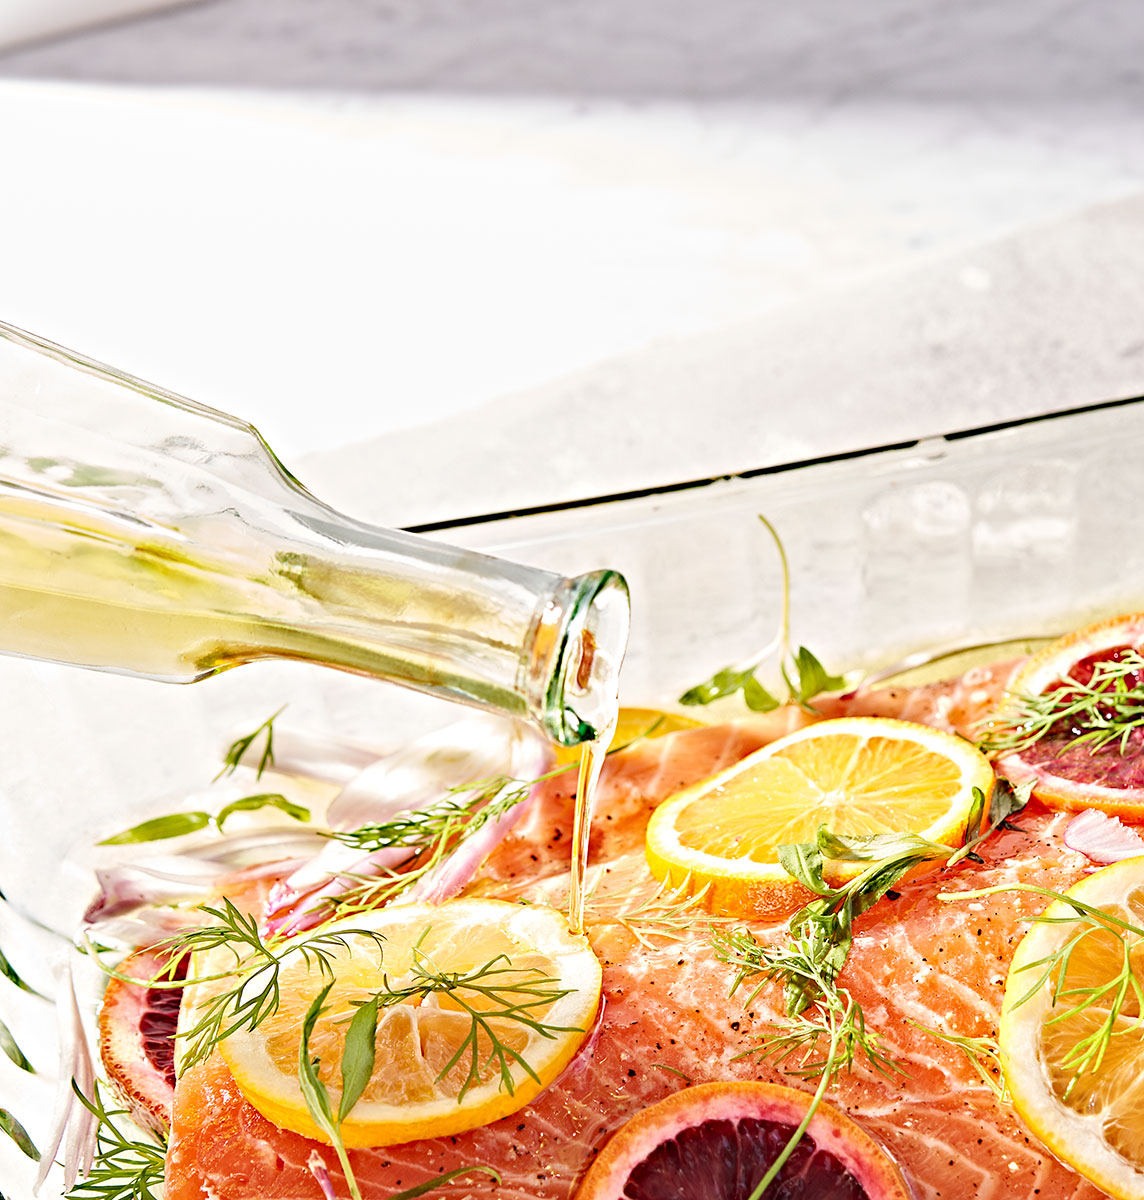
Salmon sone of my all time favorite sources of protein. I love it hot, I love it cold and sometimes I run out of ideas as to how to cook it. This slow roasted version uses a slow oil poaching method that locks in moisture and a bright citrus flavor. this salmon is perfect for lunch or dinner and is delicious cold served on salad or sandwiches.

The eclectic kitchen and I hope you enjoy this fantastic recipe!

Photography by The Eclectic Kitchen

Photography by The Eclectic Kitchen

Slow Roasted Citrus Salmon

Recipe by Skylar Edberg in collaboration with The Eclectic Kitchen

Prep time: 10 minutes

Cook Time: 30 minutes

Ingredients

  • 1 blood orange, thinly sliced, seeds removed

  • 1 navel orange, thinly slice, seeds removed

  • 1 lemon,  thinly sliced, seeds removed

  • 4 sprigs fresh dill, plus more for serving

  • 4 sprigs fresh tarragon, plus more for serving  

  • 2 lb. salmon filet, skin removed

  • 1 teaspoon kosher salt

  • ½ teaspoon black pepper

  • 1 cup extra virgin olive oil

  • Flaky sea salt for serving

    Method

    Preheat oven to 300F. Evenly arrange half of the orange and lemon slices and half of the herbs on the bottom of a 9x13 roasting pan. Season the salmon filet with salt and pepper and place it on top of the citrus slices and herbs. Place the remaining citrus slices and herbs on top of the salmon and drizzle with olive oil. Bake for 30–40 minutes for medium-rare. Serve with fresh herbs along side a salad or root vegetable puree.


Slow cooker tomato braised brisket

Tender, melt in your mouth brisket that will impress any crowd.

crystal-cartier-passover-brisket-8624.jpeg

A tender, melt-in-your-mouth brisket is a beautiful thing. Classy enough for a holiday (like Passover), yet simple enough for any night’s dinner. When you add the ease of the slow cooker to the equation life couldn’t get much better. The only hard part of it all is having to smell this amazingness hours before you can dive in!

The veggies end up perfectly tender and flavorful and you’re left with a delicious, thin tomato “jus” style gravy to pour over it all. Whether it’s the main event at a Passover seder or your favorite Wednesday night dinner, this tomato braised slow cooker brisket is a total winner!

Slow-Cooker Tomato Braised Brisket

Recipe by: Skylar Edberg in collaboration with The Eclectic Kitchen
Prep Time: 15 minutes

Cook Time: 6 hours

Serving Size: Brisket 8 - 10

Ingredients:

2 yellow onions, thinly sliced

4 large carrots, peeled and halved lengthwise

4 Celery ribs, sliced crosswise

4 garlic cloves minced

2 tablespoons tomato paste

1/2 cup sweet red wine (manischewitz)

2 tablespoons apple cider vinegar

1 28 ounce can crushed tomatoes

1/4 cup dark brown sugar

¼ cup dried dates, pitted and roughly chopped

1 Bay leaf

5-6 lb. brisket

2 tablespoons kosher salt

1 tablespoon coarse ground black pepper

2 teaspoons sweet paprika

2 cups unsalted beef stock, divided

Method:

In a 5- to 6-quart slow cooker, combine onions, carrots, celery, garlic, tomato paste, red wine, vinegar, tomatoes, brown sugar, dates bay leaf and beef stock. Season brisket with salt, pepper and paprika and place, fat side up, in slow cooker. Add broth. Cover and cook on high until brisket is fork-tender,about 6 hours,(flipping half-way through) . Remove brisket and refrigerate overnight for best results or thinly slice against the grain and serve with the vegetablesand cooking liquid over the top.


*I suggest making this brisket ahead of time and refrigerating it for 24 hours before slicing as you will get more flavor and even slices. Reheat the brisket at 300 degrees for about 1 hour.


Not your Bubbe’s Charoset

This Charoset is more than just a seder symbol.

Photograph by The Eclectic Kitchen

Photograph by The Eclectic Kitchen

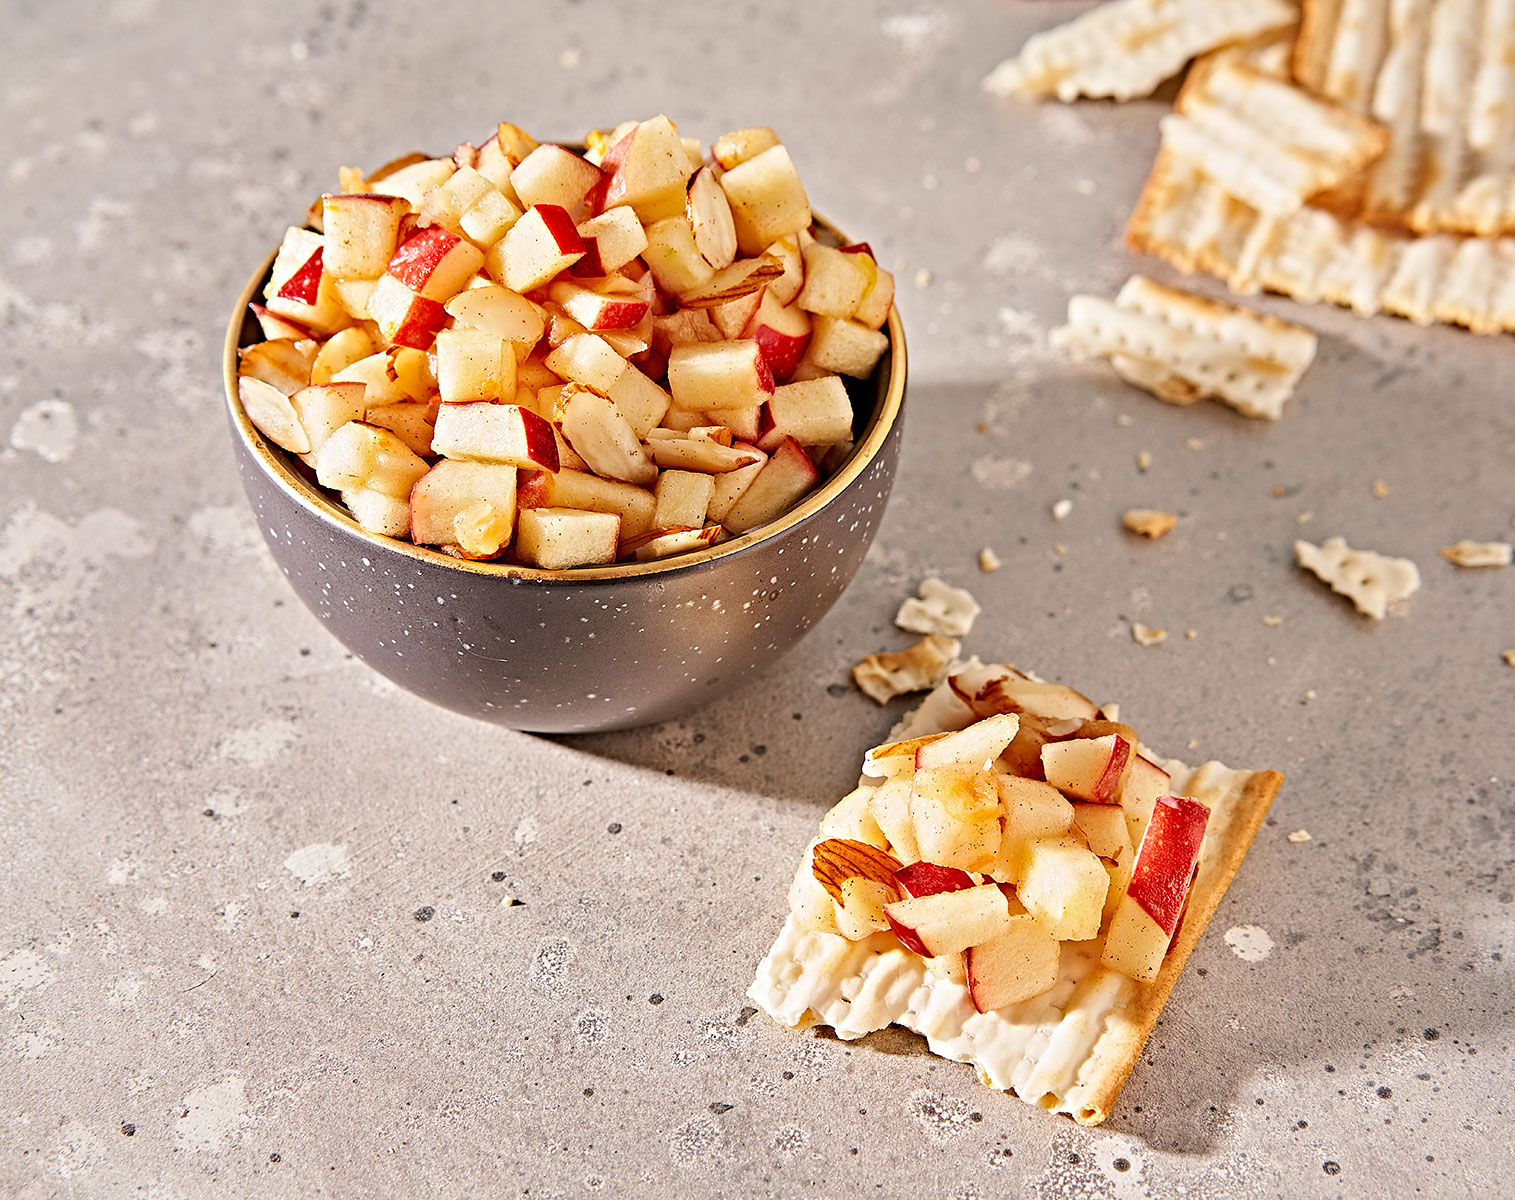
One of my absolute favorite recipes during passover happens to be Charoset. Charoset is typically a mixture of apples, cinnamon, walnuts and a ton of manischewitz wine, but most of the time it’s mushy, sticky and overly sweet in my opinion.

This sweet paste is symbolic during passover because it  is meant to remind people of the mortar used by the Israelites when they were slaves in Egypt. My modern spin on charoset is a lightened up version. I use crisp gala or fuji apples, almonds in place of walnuts, white wine in place of sweet red wine. This modern take on a seder symbol is perfect alongside your favorite passover dishes or can even be enjoyed throughout the year as a fruity addition to a charcuterie or cheese board.


Not Your Bubbe’s Charoset

Recipe developed by Skylar Edberg in collaboration with The Eclectic Kitchen.

Prep time: 10 minutes

Yield: 4 servings

Ingredients

  • 1 cup slivered almonds

  • 1 cup dried apricots, finely diced

  • ½  cup fresh squeezed orange juice

  • 1 teaspoon finely grated orange zest

  • Zest and juice from one lemon

  • ¼  cup pinot grigio or dry white wine, or white grape juice for kids

  • ¼  cup honey

  • ½  teaspoon ground cinnamon

  • ⅛ teaspoon kosher salt

  • 3 crisp apples, such as gala,cored and finely chopped

Method

In a large bowl combine the slivered almonds. Apricots. Orange juice, orange zest, lemon zest, lemon juice, wine, honey, cinnamon, salt and apples. Allow mixture to sit for several hours or overnight for full flavor to develop.  Serve with your passover seder or with crackers and cheese at your next gathering.


Modern seder plate of tolerance

This is a modern take on the traditional Seder plate.

photograph by The Eclectic Kitchen

photograph by The Eclectic Kitchen

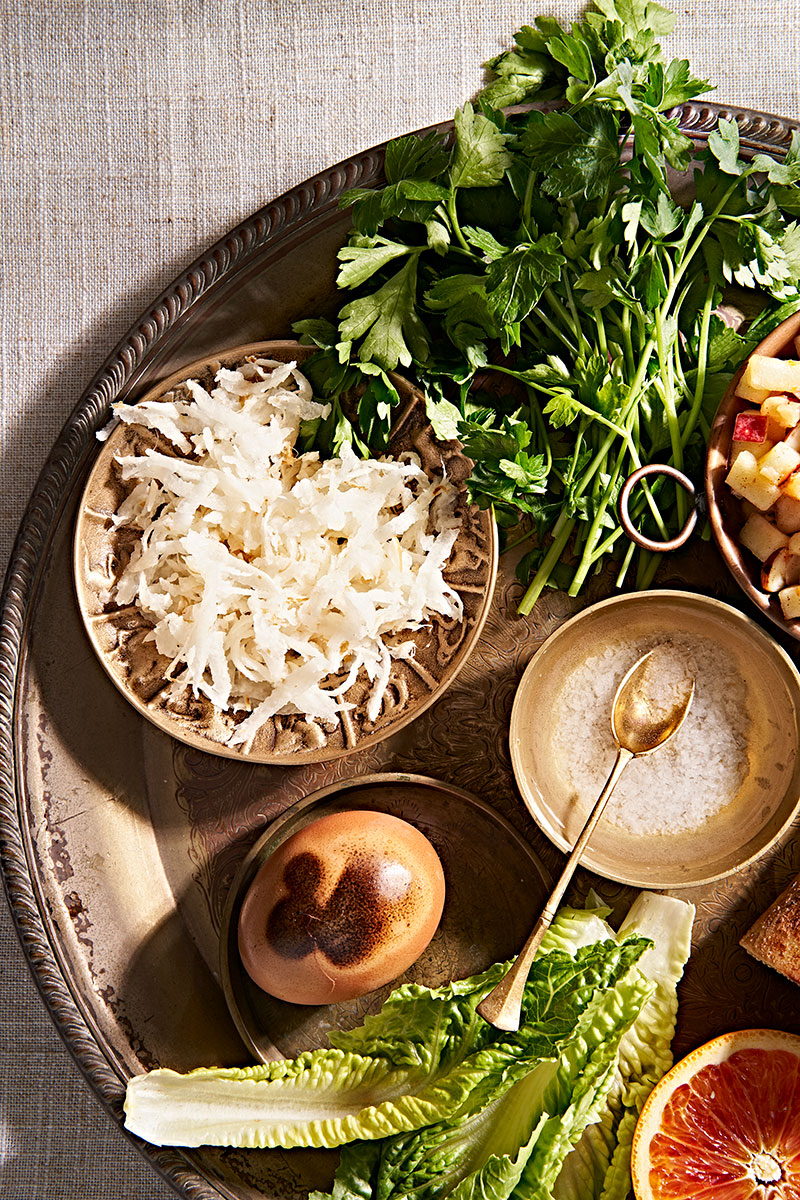
As I start creating new traditions of my own, It’s so important to me to keep certain rituals alive. Passover is one of my favorite Jewish holidays and this year I decided to create a seder plate that represents tolerance, which during this time in history has become even more relevant. I want to especially thank my friend Crystal from The Eclectic Kitchen for capturing this special centerpiece of history.

Almost every Passover seder includes various symbolic foods and other items. Nothing on the seder table is selected randomly and each item has its purpose and often has a specific place on the table or seder plate. Just because the seder traditionally uses certain ritual foods,doesn’t mean you can’t add your own traditions and rituals to your dinner that are important and relevant to you.

Here are some of the items on a passover seder table:

Seder plate:

The seder plate holds at least six of the traditional items that are talked about during the seder or ritual.  The shankbone, karpas, chazeret, charoset, maror, and egg. Most of the time, ornate decorative seder plates are used, but you can use any plate in your home. If you have kids, they can decorate a paper plate and draw a place for each item.

  • Roasted lamb shankbone: One of the most striking symbols of Passover is the roasted lamb shankbone (called zeroah), which commemorates the paschal (lamb) sacrifice made the night the ancient Hebrews fled Egypt.

  • Roasted egg: The roasted egg (baytsah) is a symbol in many different cultures, usually signifying springtime and renewal. Here it stands in place of one of the sacrificial offerings which was performed in the days of the Second Temple.

  • Maror (“bitter herb”): Any bitter herb will work, though horseradish is the most common. Bitter herbs bring tears to the eyes and recall the bitterness of slavery. The seder refers to the slavery in Egypt, but people are called to look at their own bitter enslavements, whether addiction or habit.

  • Charoset: There’s nothing further from maror than charoset (“kha-ROH-set”), that sweet salad of apples, nuts, wine, and cinnamon that represents the mortar used by the Hebrew slaves to make bricks.

  • Karpas: Karpas is a green vegetable, usually parsley (though any spring green will do). While karpas may symbolize the freshness of spring, others say people eat it to make them feel like nobility or aristocracy. Some families still use boiled potatoes for karpas, continuing a tradition from Eastern Europe where it was difficult to obtain fresh green vegetables.

  • Chazeret: The chazeret (“khah-ZER-et”) is a second bitter herb, most often romaine lettuce, but people also use the leafy greens of a horseradish or carrot plant. The symbolism is the same as that of maror.

  • Salt water: Salt water symbolizes the tears and sweat of enslavement, though paradoxically, it’s also a symbol for purity, springtime, and the sea, the mother of all life. Often a single bowl of salt water sits on the table into which each person dips their karpas during the seder. Then, it’s traditional to begin the actual seder meal with each person eating a hardboiled egg (not the roasted egg!) dipped in the bowl of salt water.

  • Matzah: Perhaps the most important symbol on the seder table is a plate that has a stack of three pieces of matzah (unleavened bread) on it. The matzot (that’s plural for matzah) are typically covered with a cloth. People have come up with numerous interpretations for the three matzot. Some say they represent the Kohen class (the Jewish priests in ancient times), the Levis (who supported the priests), and the Israelites (the rest of the Jews). What symbolism you attribute to this trinity isn’t all that important, as long as you’re thinking about it.

  • Wine cups and wine (or grape juice): Everyone at the seder has a (usually very small) cup or glass from which they drink four cups of wine. Traditionally, the four cups represent the four biblical promises of redemption: “I will bring you out from under the burdens of the Egyptians, and I will rid you from their slavery, and I will redeem you with an outstretched arm, and with great judgments. And I will take you to me for a people . . .”

  • Orange: The seeds of the orange, like other items on the seder plate, symbolize rebirth and renewal. Some people have taken on the tradition of spitting the seeds to remind us to spit out the hatred experienced by all marginalized members of our communities.

Adapted from www.dummies.com

photograph by The Eclectic Kitchen

photograph by The Eclectic Kitchen

photograph by The Eclectic Kitchen

photograph by The Eclectic Kitchen


Green Shakshuka

This green twist on traditional tomato shakshuka will have your tastebuds doing a a little shimmy!

Photography by: The Eclectic Kitchen

Photography by: The Eclectic Kitchen

One of my absolute favorite dishes I had while visiting Israel was the famous shakshuka from Dr. Shakshuka. Ever since then, I’ve been making shakshuka as a cheap and easy staple throughout our weekly meals. Its SO fast to throw together and its light because it doesn’t contain any meat. My friend Crystal of The eclectic kitchen found a photo of poached eggs in greens and really wanted to shoot something with these beautiful contrasting colors. This led me down the green shakshuka rabbit hole and now, here I am with an amazing, fresh take on the Israeli classic. Get ready to kick your tastebuds into over drive with this fresh new recipe!

  • I encourage you to be brave and let your kids try this recipe out too. Maybe involve them by letting them crack the eggs, if they are old enough. Just because something is green, doesn’t men he has to be scary or gross!

Photography by: The Eclectic Kitchen

Photography by: The Eclectic Kitchen

Green Shakshuka

Recipe by: Skylar Edberg in collaboration with The Eclectic Kitchen

Yield: 2-3 servings  

Prep time: 10 minutes

Cook time: 15 minutes

INGREDIENTS

  • 3 tablespoons extra virgin olive oil

  • 1 shallot, minced  

  • 3 garlic cloves, minced

  • 4 cups baby spinach leaves

  • 4 cups flat kale or swiss chard, ribs removed and coarsely chopped

  • 1 teaspoon kosher salt

  • ½ teaspoon black pepper

  • Juice and zest of one lemon

  • 1 cup salsa verde

  • 1 cup frozen english peas, thawed

  • 4 large eggs

  • ⅛ cup crumbled feta cheese

  • 1 cup cherry tomatoes, halved

  • 2 tablespoons chopped parsley leaves

  • 1 tablespoon chopped dill

  • Middle eastern hot sauce for garnish if desired (zhough)

METHOD

In a large 14” rimmed skillet, over medium-high heat, add the olive oil, shallot and garlic and saute about 2 minutes until softened and fragrant.

Add the spinach and kale to the pan and cook for 1-2 minutes until slightly wilted. Season the greens with salt, pepper, lemon juice, zest and salsa and gently stir in the thawed peas. Carefully turn the greens with tongs making sure to incorporate all ingredients. Cook for 2-3 minutes longer, reduce heat to low and create 4 wells in the greens using a ladle or large spoon. Crack the eggs over the top of the mixture, leaving some space between each egg. Cover the pan and allow eggs to cook, about 5-7 minutes, depending on how cooked you want the yolks. Serve topped with feta cheese, tomatoes, fresh parsley, dill, and hot sauce. Enjoy immediately.


Gluten-Free Strawberry Sunrise Bars

Bring a little sunshine into your life with these gluten-free/vegan strawberry sunrise bars.

Photography By The Eclectic Kitchen

Photography By The Eclectic Kitchen

Breakfast is hands down my favorite meal of the day, but when The Eclectic Kitchen and I decided to come up with blog recipes, we knew we had to include a “make ahead” breakfast bar that could get ourselves and our families out the door in a hurry if we needed to. These bars are a guilt free way of telling your family how much you love them but “we are late!”. Great for breakfast, snack or even dessert topped with vanilla ice cream. This bright flavor combination of sunny berries and oranges, combined with the creamy, nuttiness of oats and coconut are the perfect way to send your tastebuds off to paradise. I hope you try these at home and enjoy them as much as we do!

Strawberry Sunrise Bars

Recipe By Skylar Edberg in collaboration with The Eclectic Kitchen

Yield: 16 servings

Prep time: 20 minute

Cook time: 30 minutes

INGREDIENTS

  • 1 cups rolled oats, plus 2 tablespoons for topping

  • ½  cup oat flour*

  • ⅛ teaspoon kosher salt

  • ½ cup unsweetened coconut flakes, finely chopped

  • 1 teaspoon baking powder

  • 1 cup mashed banana, about 2 medium  

  • ⅛  cup maple syrup, plus 2 tablespoons for filling

  • 1 teaspoon vanilla extract

  • 1 teaspoon orange zest

  • 2 cups diced strawberries

  • 1 ½ teaspoons cornstarch or arrowroot

  • 1 tablespoon fresh orange juice

  • 2 tablespoons slivered almonds (optional)


    METHOD

    Preheat oven to 350 degrees and grease an 8x8 baking dish with non-stick cooking spray and line with parchment paper.

    In a large mixing bowl combine rolled oats, reserving 2 tablespoons for topping, oat flour, salt, coconut and baking powder

    Using a rubber spatula, stir in the mashed banana, maple syrup, vanilla extract and orange zest. Mix until combined and a sticky dough is formed.

    Transfer ½ of the mixture into the prepared baking pan and use your fingers to press the dough into the bottom. Bake for 10 minutes while you prepare the filling.

    In a small bowl combine the strawberries, cornstarch, orange juice and 2 tablespoons maple syrup. Sprinkle the strawberries on the surface of the dough and top with remaining oat mixture, reserved rolled oats and slivered almonds.

    Bake for 20 minutes until the top becomes  light golden brown. Remove bars from the oven and cool completely in pan.

    Cut the cooled bars into 16 squares and store at room temperature or refrigerator for up to one week. Freeze up to one month.

    *If you don’t have oat flour, process 1 cup rolled oats in a food processor on high for about 1 minute until a fine flour forms

Copy of Spaghetti Squash Chow Mein

All of the flavor take-out Chow Mein minus the carbs. You’re welcome.

Photography by The Eclectic Kitchen

Photography by The Eclectic Kitchen

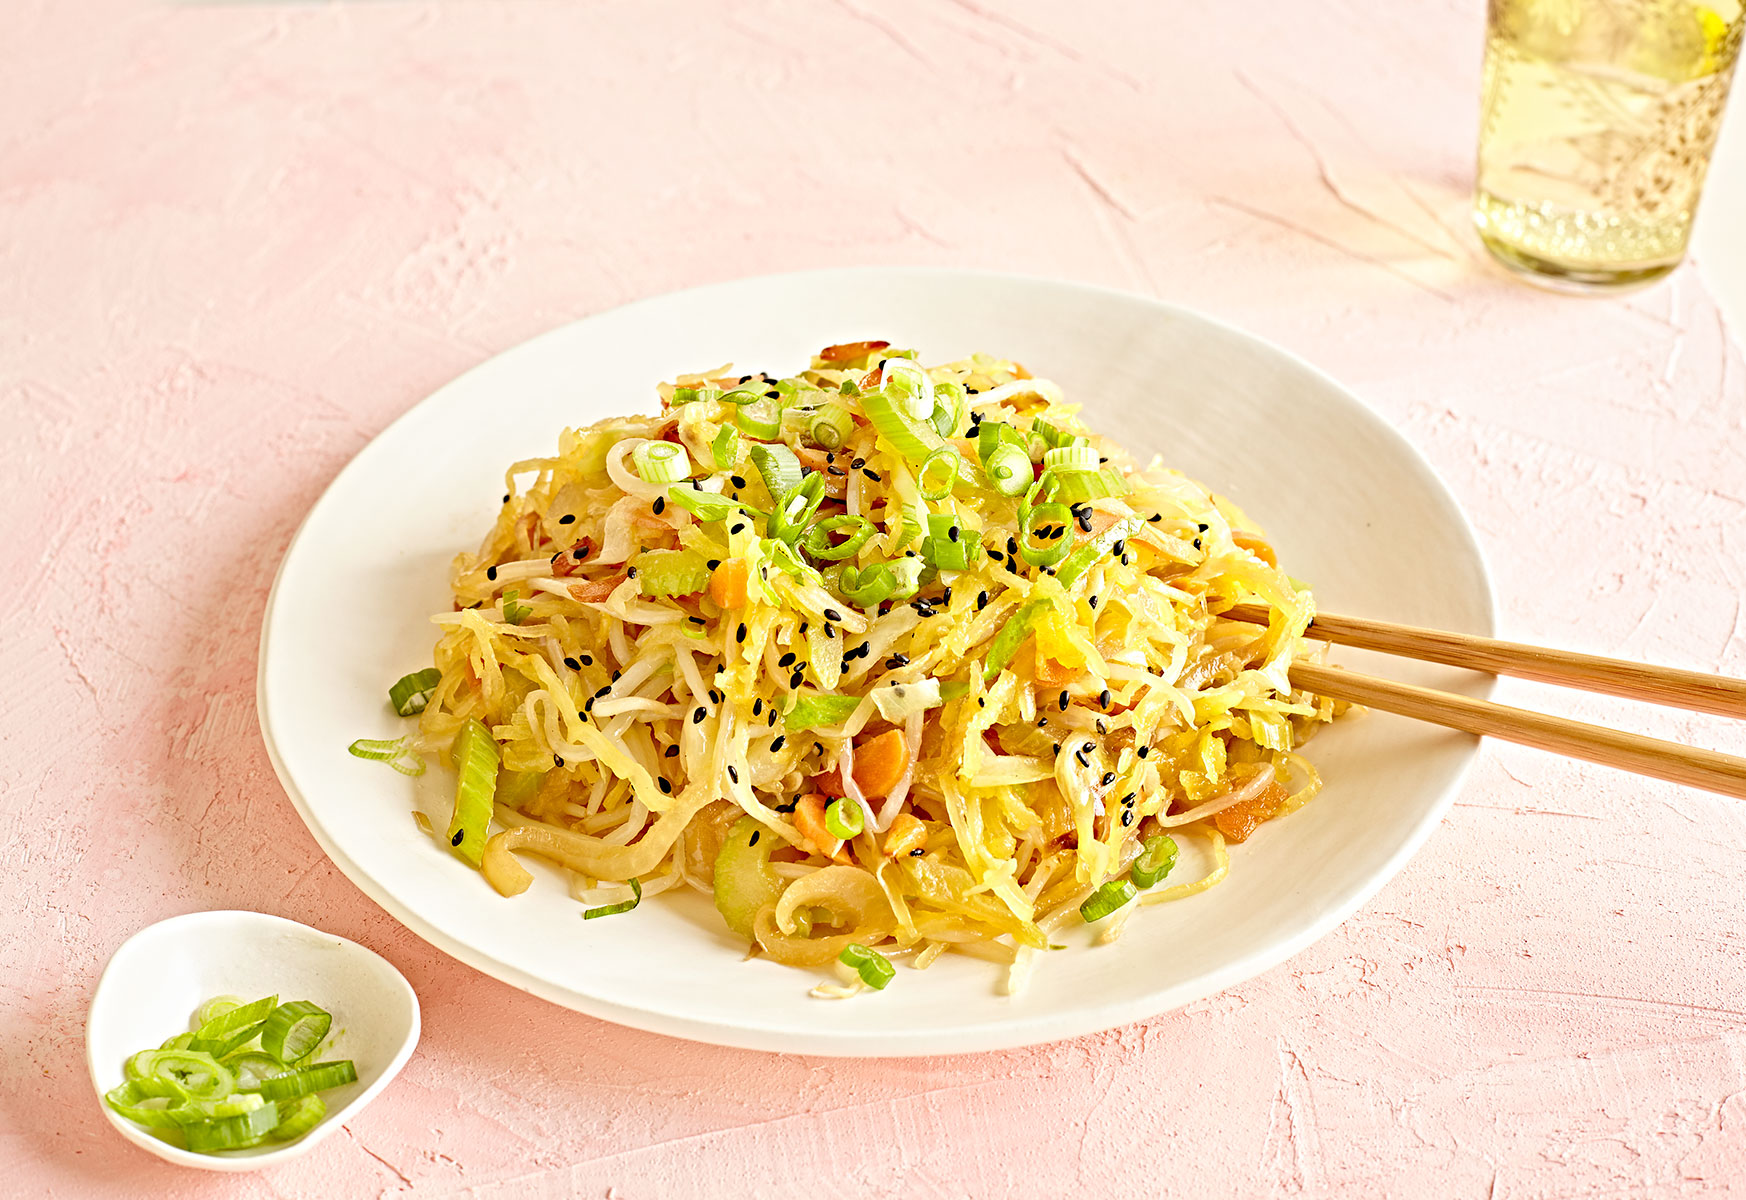
As you can probably tell by Tuesday’s post, The Eclectic Kitchen and I are huge fans of asian flavors and especially healthy recreations. I know that I can’t replace the deliciousness of starchy fried noodles, but I can tell you, this veggie based dish is perfect for meatless Monday, or meatless any day for that matter! Pair this dish with fried tofu or top with my baked orange chicken and you’ll happy you skipped grub hub tonight!

Spaghetti Squash Chow Mein

Recipe by: Skylar Edberg in collaboration with The Eclectic Kitchen

Yield: 4 servings

Prep time: 30 minutes

Cook time: 20 minutes

INGREDIENTS

For the chow mein:

  • 1 large spaghetti squash

  • 1/2 cup low sodium soy sauce

  • 3 garlic cloves, grated

  • ½  tablespoon toasted sesame oil

  • 1 tablespoon maple syrup or agave nectar

  • 3 teaspoons freshly grated ginger

  • 2 tablespoons avocado or flavorless oil

  • 1/2 yellow onion, diced

  • 3 celery stalks, thinly sliced diagonally

  • 2 carrots, peeled and julienned

  • 2 cups thinly shredded green cabbage

  • 1 cup bean sprouts

  • Sliced green onion for garnish


METHOD

Preheat oven to 375 degrees, and prepare a rimmed baking sheet with nonstick cooking spray.

Use a fork to poke several holes across the surface of the spaghetti squash. Place the quash in a microwave safe dish and cover with a wet paper towel. Microwave for 8-10 to help soften the skin.This allows for easier cutting. Once cool enough to handle, cut the spaghetti squash in half crosswise and scrape out the seeds. Using a fork, scrape the flesh of the squash to create long strands and set aside in a separate bowl.

In a small bowl, whisk together soy sauce, garlic, brown sugar, ginger and sesame oil. Set aside.

In a large skillet over medium-high heat, heat vegetable oil. Add onion, celery and carrots and cook, stirring often, until tender, about 3 to 4 minutes. Stir in cabbage and bean sprouts and saute until heated through, about 2 minutes. Stir in the soy sauce mixture and cook for about 1 minute. Stir in spaghetti squash until well coated.  Serve plain or top with baked orange chicken. (See recipe)